How to Secure Access to Your PC
Overview
Most modern operating systems have a number of features for protecting privacy and data. They have features such as disk encryption, integration with smartcards for PIV authentication (such as YubiKey), and more. In this guide, we’ll outline some of the basic steps you can take.
Generally speaking, you should do the following, regardless of which OS you’re using:
- Enable full disk encryption
- Make sure you use a lock screen, and that your screen locks automatically after some period of time, or when the lid is closed (if it’s a laptop)
- Use a smartcard with a PIN to login, or
- Use a strong password, one which is not used elsewhere, especially not the same password as used for a password manager
macOS
macOS: Enable Disk Encryption
macOS features a tool called FileVault 2, which provides full disk encryption. The private key is stored on disk, and can be unlocked using your account login password. Note that your password is not the same as the key used to encrypt the data on disk.
Follow the official Apple guide for enabling FileVault 2. Save your recovery key somewhere safe (perhaps in a safe?). It’s recommended that you do not enable recovery through iCloud, because it requires storing private keys on Apple’s servers, which could be compromised or retrieved through coercion.
macOS: Enable Lock Screen
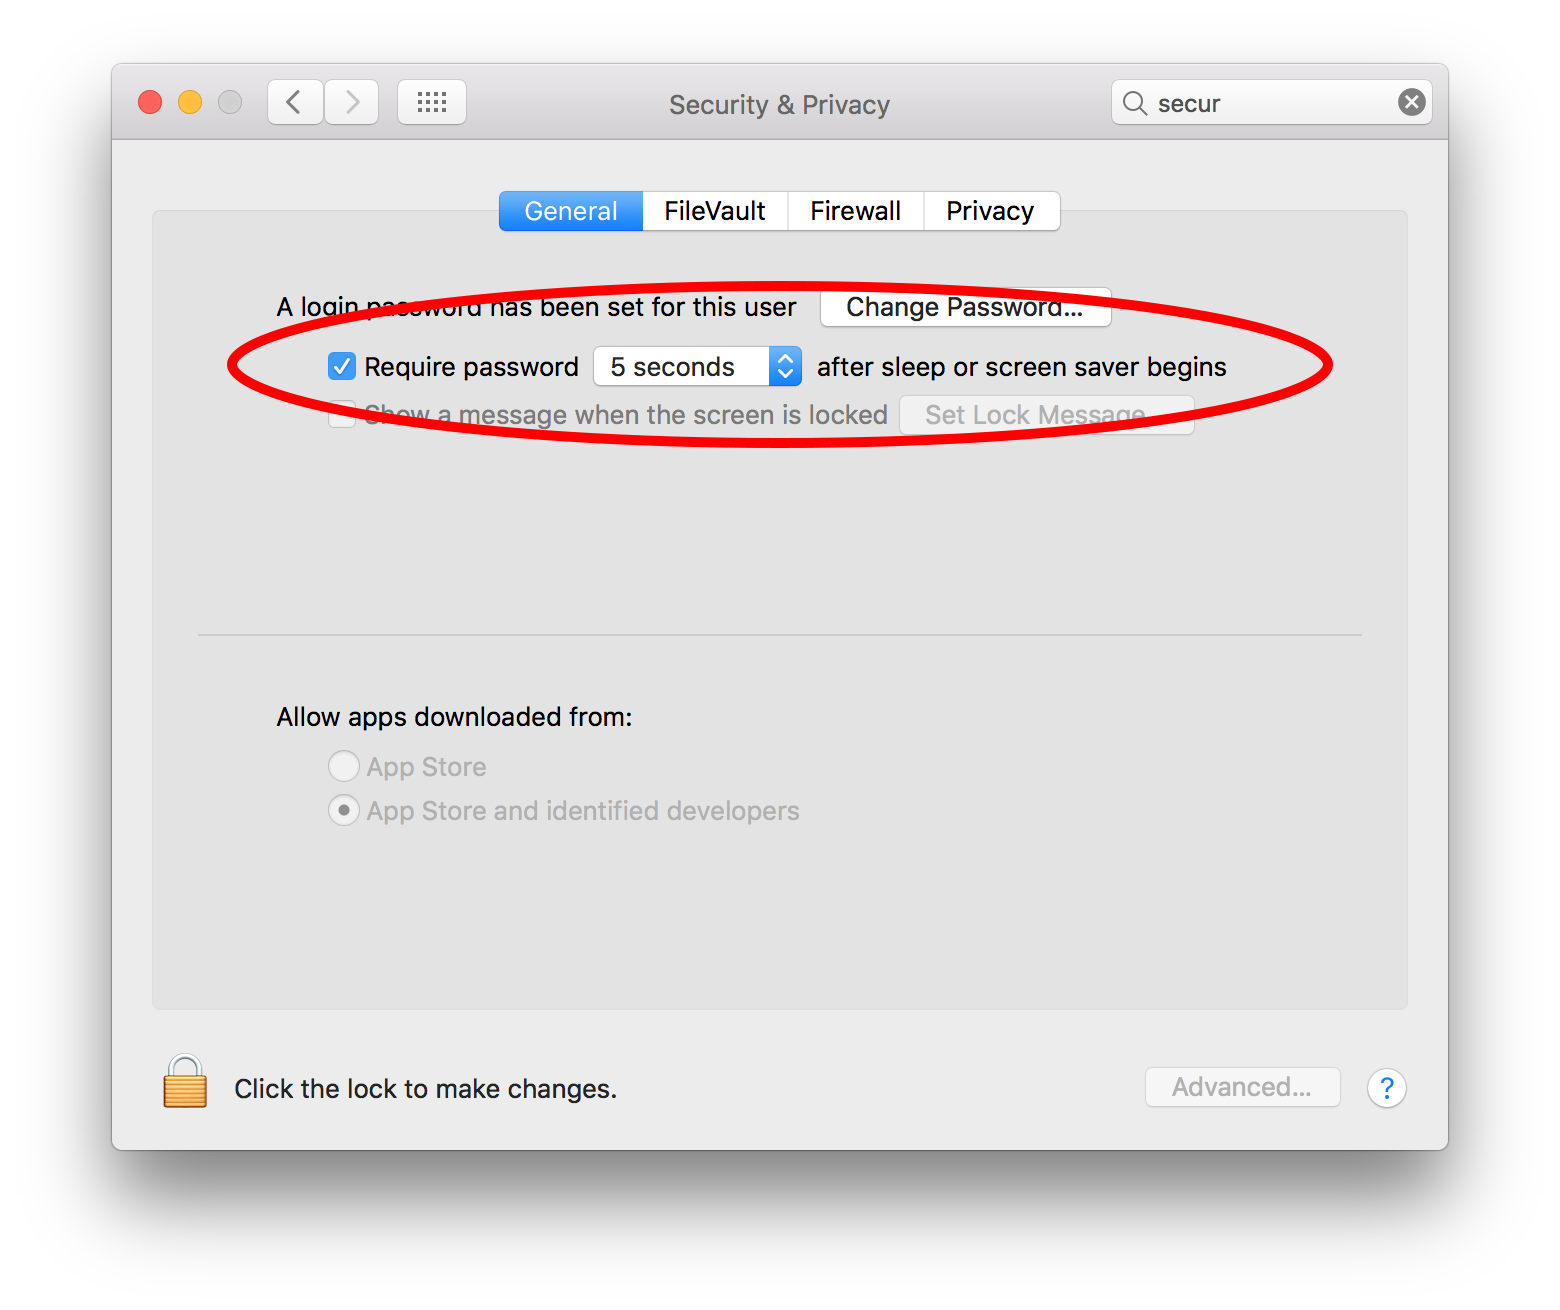
From the Security & Privacy settings in the macOS system preferences, enable the lock screen by checking the “Require password […] after sleep or screen saver begins” box.
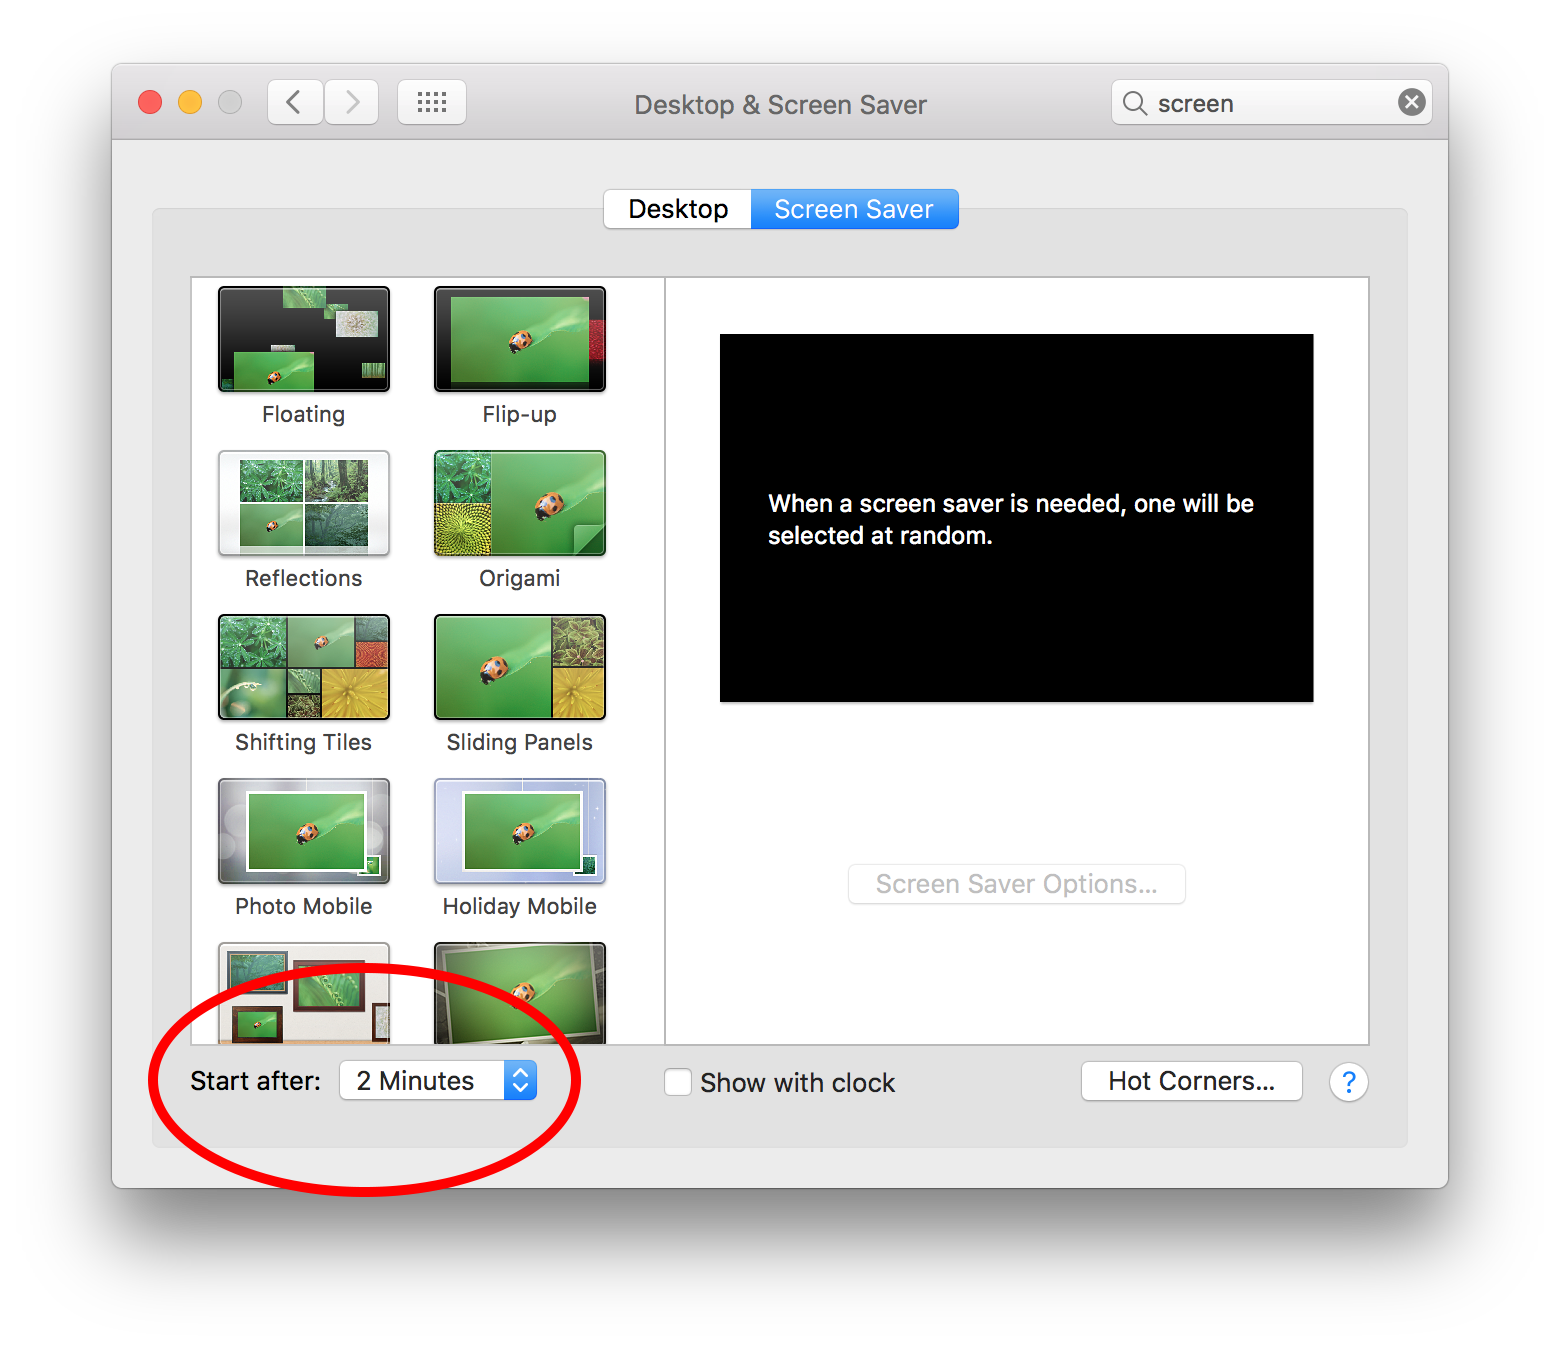
From the Desktop & Screen Saver settings in the macOS system preferences, set the “Start after: […]” time to a short value, such as 1 or 2 minutes.
macOS: Use a YubiKey for Login Password
You can use a YubiKey for storing a secure account login password for your computer. To do this, you must configure your YubiKey to store a static password.
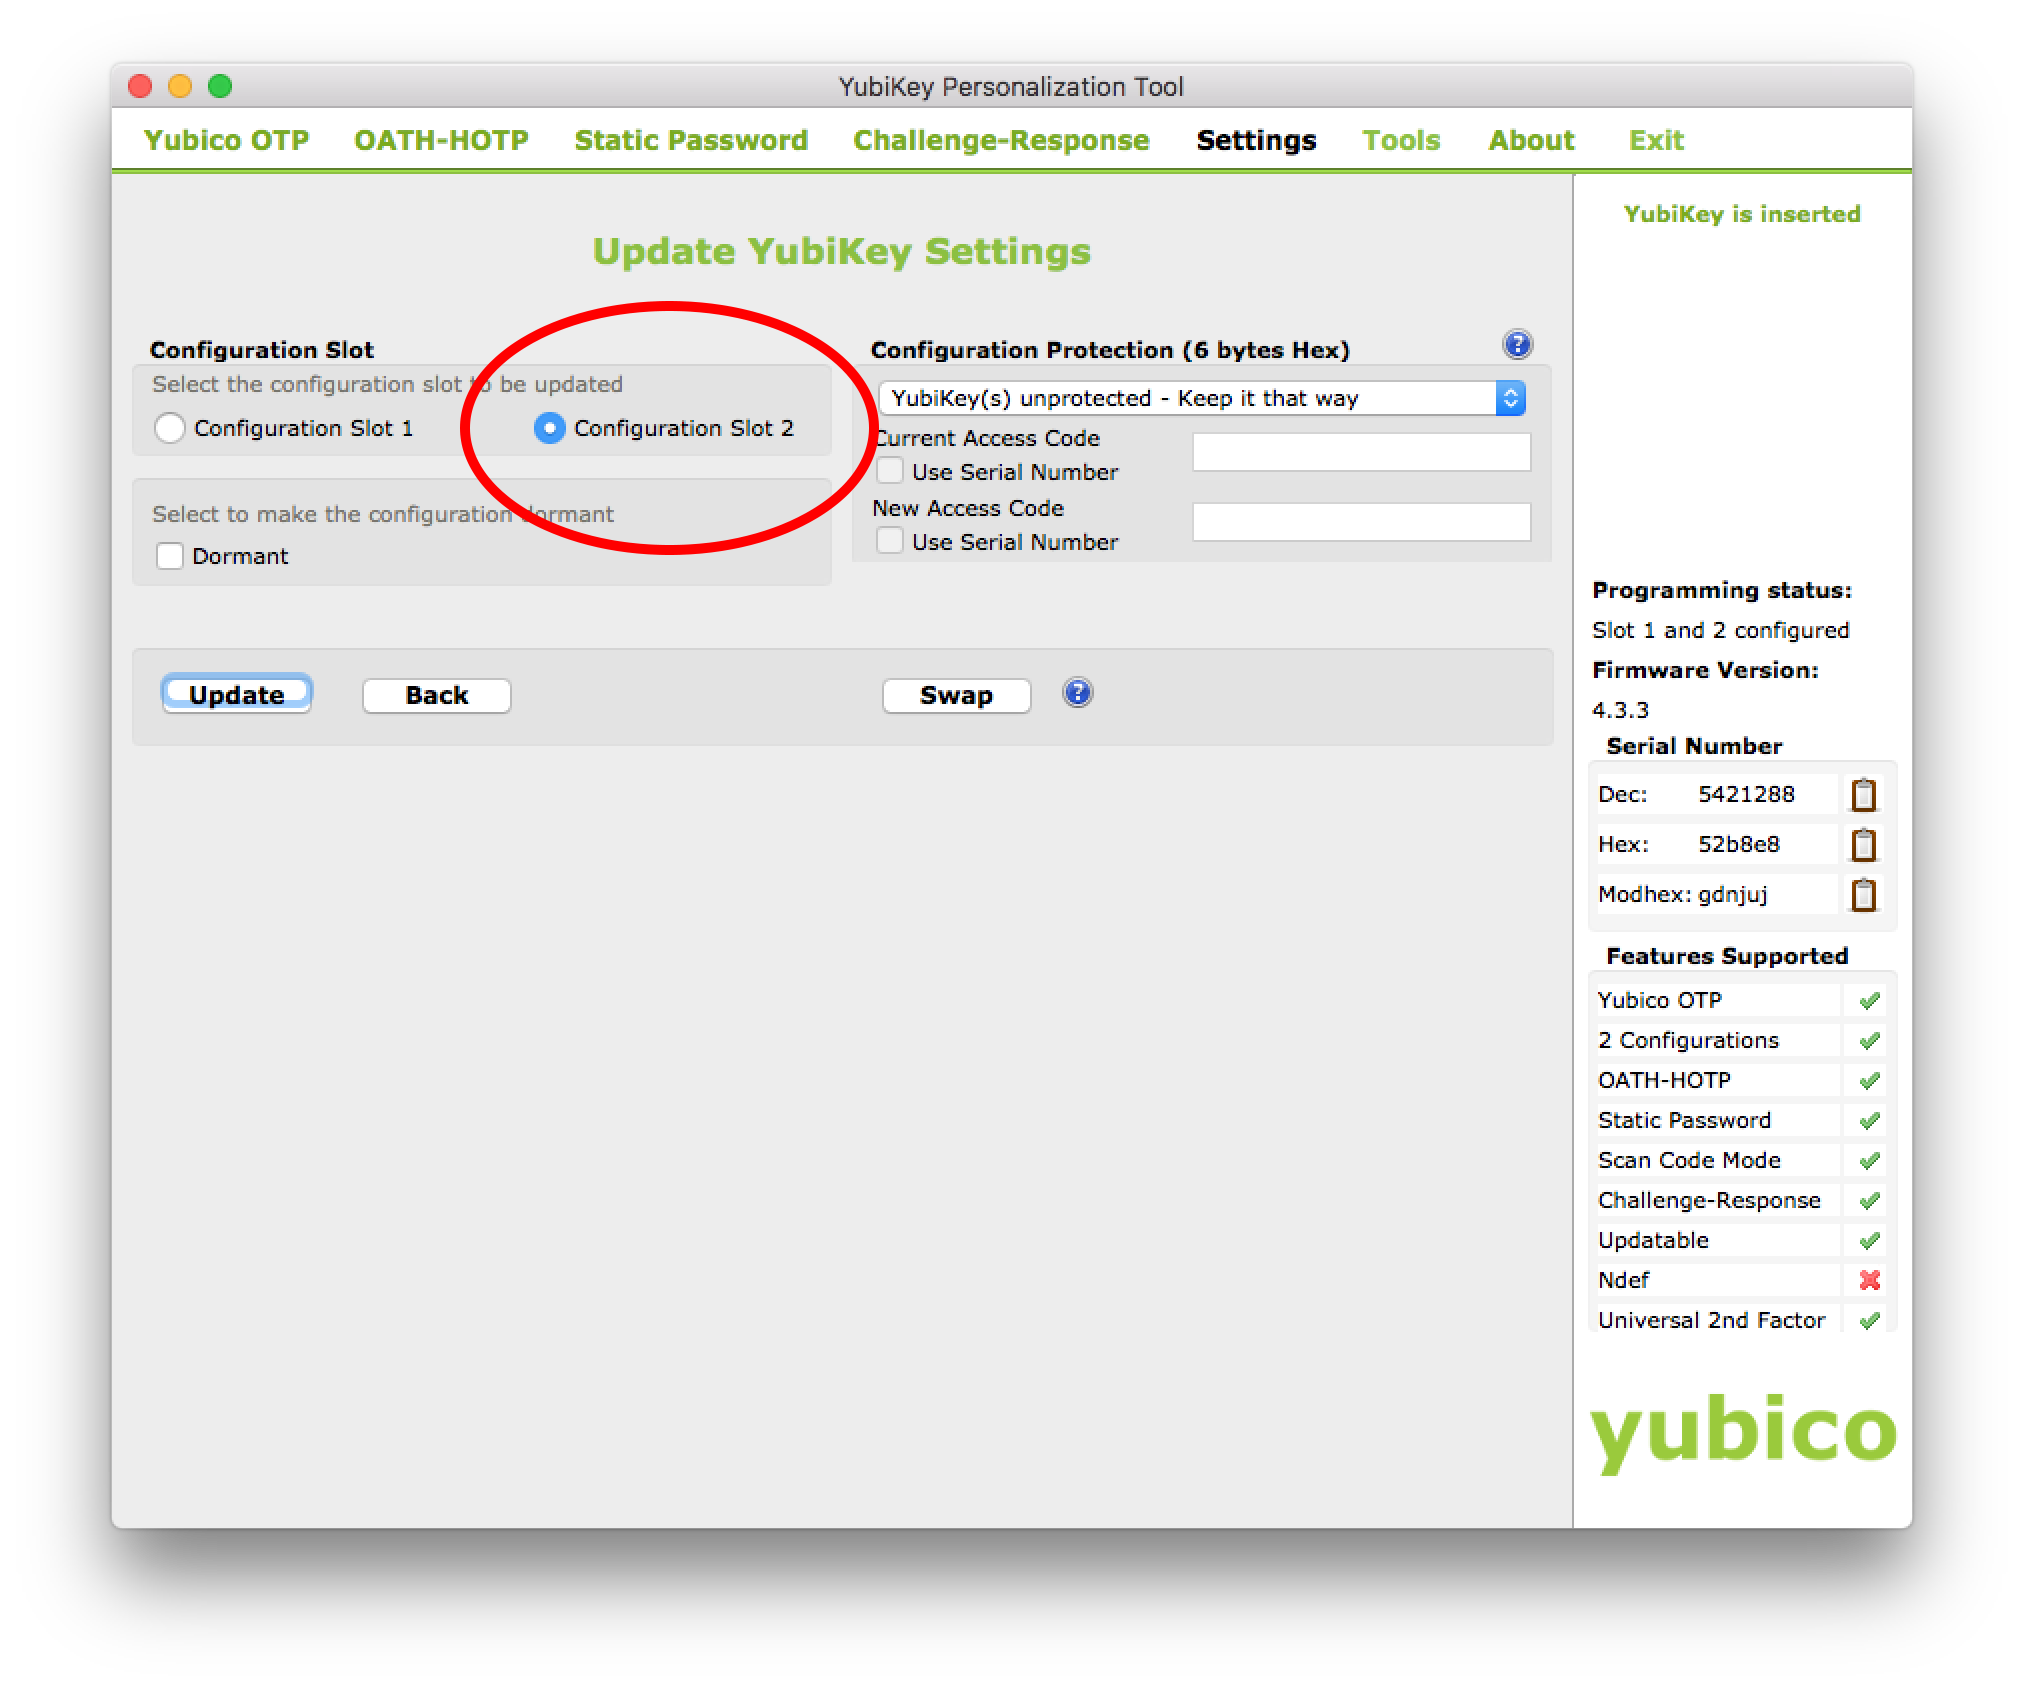
Follow the static password generation guide from Yubico. It’s recommended you program slot 2 with your password. Afterward, install and open the YubiKey personalization tool and connect your YubiKey. You must change the key delay to at least 40ms, otherwise the YubiKey may not work at login time. Go to the “Settings” panel in the YubiKey personalization tool, and change the output character rate to 40ms.

Next, write the configuration to the appropriate slot (if you used slot 2, write to slot 2).
Once you have a static password set in the YubiKey, set your account login password using the YubiKey. From the Users & Groups panel in system preferences, set your new password by typing a short password (such as “CatsRCool”), then tap the YubiKey to enter the rest of the password. If you programmed slot 2, you must use a long tap (i.e., hold your finger on the YubiKey until the password is entered). If you programmed slot 1, use a short tap.
This is sort of like having 2FA for your account login password, because you’re combining something you know (the prefix) with something you have (a long random password stored in the YubiKey).
macOS: Use a YubiKey for PIV Authentication
With PIV authentication, you can login to your computer by inserting the smartcard (such as a YubiKey) and entering a PIN. This may be more convenient than other login methods, such as remembering a long password. Typing a long password into your computer may be less secure, since someone with a hidden camera could record you while entering the password. You may also be susceptible to key loggers. It’s much harder to defeat this type of authentication, because it would require physical access to the device. This is sort of a type of 2FA for your laptop: it requires something you know (a PIN) and something you have (a YubiKey).
If you have a YubiKey, it’s recommended that you use it as a smartcard for PIV authentication. Yubico provides a guide for the process here.
Linux
This section has not yet been written. Please contribute!
Windows
This section has not yet been written. Please contribute!